Understand Python Environment management through a hiking trip.
Let's learn about Python Environments as an adventure, shall we?
Confidence: likely
Let’s learn about Python Environments as an adventure, shall we?
You can find a lightning talk version of this blog post given at PyData London 2022 here!
Introduction
You like going on adventures.
An Adventurer’s Life
For every adventure you need different kinds of tools. Every trip, it takes you hours to correctly prepare your backpack. Later on you decide to buy one backpack per type of adventure. A backpack for hikes, another one for rock climbing, and a third one for canoeing. You soon find out how easy it is to only care about planning the adventure itself when your tools are ready. One day you find yourself interested in kayaking, camping, mountaineering, and skydiving, which made managing too many backpacks a hassle. You then decide to hire someone to take care of preparing your backpacks and tools for each trip. You tell them what tools you need for your trip, they prepare the backpack and tools needed, and you care about planning your adventure. Some special tools can be found in (few) places, so you try to specify where to buy them from (we don’t want our assistant to search all possible shops!). This sounds more manageable, scalable with your neverending interests, and easily maintainable. What a beautiful relaxing adventurer life!
You may say
Wait, what on Earth does is have to do with Python Environments?
A Programmer’s Life
Well, Python programmers (and programmers in general) face very similar problems. They start by (maybe) being interested in Statistics, Graphical User Interfaces (GUI), and some REST APIs. Every one of which needs different libraries [tools] to get the job done. Installing [packing] all those libraries [tools] on your system and carrying all of them around for every project [adventure] could be confusing. What if this Statistics project only works with the old awesome-lib version 2, but the new REST APIs project needs the newer awesome-lib version 3? What if I need to run my Statistics project somewhere else, do I install all libraries [tools] I ever used for all of my projects? If not, how can I find out which tools are for which project?
Luckily there’s a solution.
You may ask
Can we just hire someone to prepare my “backpack” for every project?
The answer is yes! You can hire conda, pipenv, poetry, virtualenv and that’s their job! Best part? They do it for free and you can specify different locations to get your special tools (libraries) from.
You can even hire someone like pyenv to buy the backpacks you need.
Those are possible to be done for free thanks to amazing communities and open source contributors spending time and money to make it happen. Always consider contributing back to the community with your time, money, helping others, or any way that fits you.
The Analogy
| Adventurer | Python Programmer |
|---|---|
| Trip | Project |
| Backpack | Python Environment |
| Backpack Type | Python Version |
| Tools | Python Libraries |
| Assistant | Python Env and Package Manager |
| Tools Shop | Repositories |
Now how does it work in practice? Do you need to learn about all of them? What do they have in common? How can they pack my backpack? How to use and manage this backpack?
This blog post will walk you through how to prepare and manage your backpack for a small dummy project.
How hard can it be?
Let’s get back to our Analogy
| Adventurer | Python Programmer |
|---|---|
| Have a Trip goal | Have a Project type |
| Prepare a new empty backpack | Create a new empty Python Environment |
| Decide on the tools needed for the specified trip | Decide on the libraries needed for this project |
| List down the shops from which the tools will be bought | List down repositories to download libraries from |
| Hire an assistant for the job | Install a Python Environment and Package Manager |
The One Backpack Approach
If you were to use one backpack for all your trips, the only thing you need to care about is preparing your tools.
Let’s start with this scenario, and then move on to learning about preparing multiples backpacks.
In Python, we have a standard way of installing packages (libraries) using a tool called pip.
pip is a recursive acronym and stands for pip installs packages.
Sometimes pip does not come with Python, so we have to install it ourselves.
Whenever you need to install anything, check if you have it first. After installation, check if it was correctly installed. Developers, more often than not, skip the ‘checking’ phase and only follow tutorials blindly then spend their time debugging bugs they could have avoided by simple sanity checks!
Just make sure to double check the correct things…

Finding Python
On Mac and Linux, you usually have two Python distributions already installed on your system: Python 2 and Python 3 (Although Python2 reached end of life and won’t ship with newer OS versions anymore). Those specific Python distributions are used by internal components in the Operating System (macOS and Ubuntu), which makes them less favorable to be messed up with for other projects. Let us leave them in peace, and use our own different Python distributions for development, so we don’t mess up anything being used by our system.
You can check your current versions of Python2 and Python3
python --versionOutput
Python 2.7.17By default, python is linked to Python 2 on your system. For Python 3, you will use very similar commands to Python 2, but adding the 3 to it: python3. Newer systems however have python linked to Python 3, so just make sure to check.
python3 --versionOutput
Python 3.6.9What if we install our own Python 3.6.9, how can I know if I am using the default one on the system or my own?
which python3.6Will return the path to the binary executed when running python3.6, in our case:
/usr/bin/python3.6You can safely consider that anything under /usr/bin is used by your system by default and should not be messed up with.
For the rest of this tutorial, we will be using Python 3.11. Python 2 reached end of life on January 1st 2020.
If we don’t want to use the system python, how can we install our own?
A New Backpack
There are several ways to install a new Python version alongside the others:
- Install it directly on the system.
- Use
pyenvto manage python installations on your system. - Use
condato install relevant python version on environment creation.
If we go for Option 1, we can technically install any Python version either from pre-built binaries or from source. Either ways will end up with the system having multiple python versions installed with no single point to manage all of them.
If we go for Option 2, pyenv will manage multiple Python Versions on your system and save you the hassle of the manual work.
If we go for Option 3, we will hand everything to conda from python version management to environment management.
Option 2 looks like Option 1 but without the hassle.
Option 3 looks easier than Option 2 and will be left as an exercise to the reader.
Using PyEnv
Quoting the authors of the library:
pyenv lets you easily switch between multiple versions of Python. It’s simple, unobtrusive, and follows the UNIX tradition of single-purpose tools that do one thing well.
We said that, by default on Ubuntu 18.04, we had Python 2.7.7 and Python 3.6.9 installed. We also said that we will proceed with Python 3.11 for Textual. How can we download/setup/install/whatever has to happen to have Python3.11 ready using pyenv?
Please follow the Installation Instructions before proceeding.
PyEnv Concepts
- Global Python Version: The default version we want our system to be using at all times.
- Local Python Version: A specific Python version we want to be used when we invoke
pythonin a specific directory. - Python Installation: A specific python version installed in the root directory of
pyenv
We need Python3.11, so we will install it on our system using pyenv
pyenv install 3.11This will install the latest available version of 3.11:
python-build: use [email protected] from homebrew
python-build: use readline from homebrew
Downloading Python-3.11.1.tar.xz...
-> https://www.python.org/ftp/python/3.11.1/Python-3.11.1.tar.xz
Installing Python-3.11.1...
python-build: use readline from homebrew
python-build: use zlib from xcode sdk
Installed Python-3.11.1 to /Users/jeanmarcalkazzi/.pyenv/versions/3.11.1
This will download and install Python-3.11.1 on the system. To make sure it worked:
pyenv versions* system
3.6.9
3.9.4
3.11.1We see that 3.11.1 is listed in the available versions.
Being listed is one thing, and being usable is another.
As far as Pyenv is concerned, version names are simply directories under $(pyenv root)/versions.
Which means that our python executable should be under $(pyenv root)/versions and will invoke the Python Interpreter.
Input
$(pyenv root)/versions/3.11.1/bin/pythonOutput
Python 3.11.1 (main, Feb 20 2023, 22:23:32) [Clang 14.0.0 (clang-1400.0.29.202)] on darwin
Type "help", "copyright", "credits" or "license" for more information.
>>> print("Well, I guess it works")
Well, I guess it works
>>>
Now that we have our backpack, we need to get the tools.
Let’s try to install numpy
python3.11 -m pip install numpyWhy use python3.11 -m pip install X instead of just pip install X?
First option will ensure that we are putting the right tool in the right backpack, in our case, 3.11. For more details check out this great post by Brett Cannon who is a Python Core Developer and amazing writer!
Now we have numpy-1.24.2 installed in the pyenv’s python3.11.1 installation.
This is great, until you have another project which also uses python3.11.1 but needs an older version of numpy. How can you achieve that? Having only one backpack won’t help, and given that the backpack is virtual here and we can have as many copy as we need, why not use it as a blueprint and just clone it for each new project with such a needed version?
The Multi-Backpack Approach
Our goal is to manage different Python environments for different projects. A Python environment is just a separate Python backpack on your system where you will install any library you need. To do so, we will:
- Hire a Python Environment Manager
- Ask it to create a new environment
- Tell it about the libraries we will need to use in this environment
Once our backpack (environment) and tools (libraries) are ready for our next adventure, we will start using them.
So what we need is:
- A Python Environment Manager to use.
- Creating a new Python Environment (Backpack) based on the versions we are managing (with tools like
pyenv). - Have a list of tools (libraries) to prepare for the adventure.
One possible env manager is poetry. You may find a lot more, and by the time you read this post you could have multiple other tools released, but just focus on what you need to be done, then choose a tool which can do it for you.
The Trip Goal
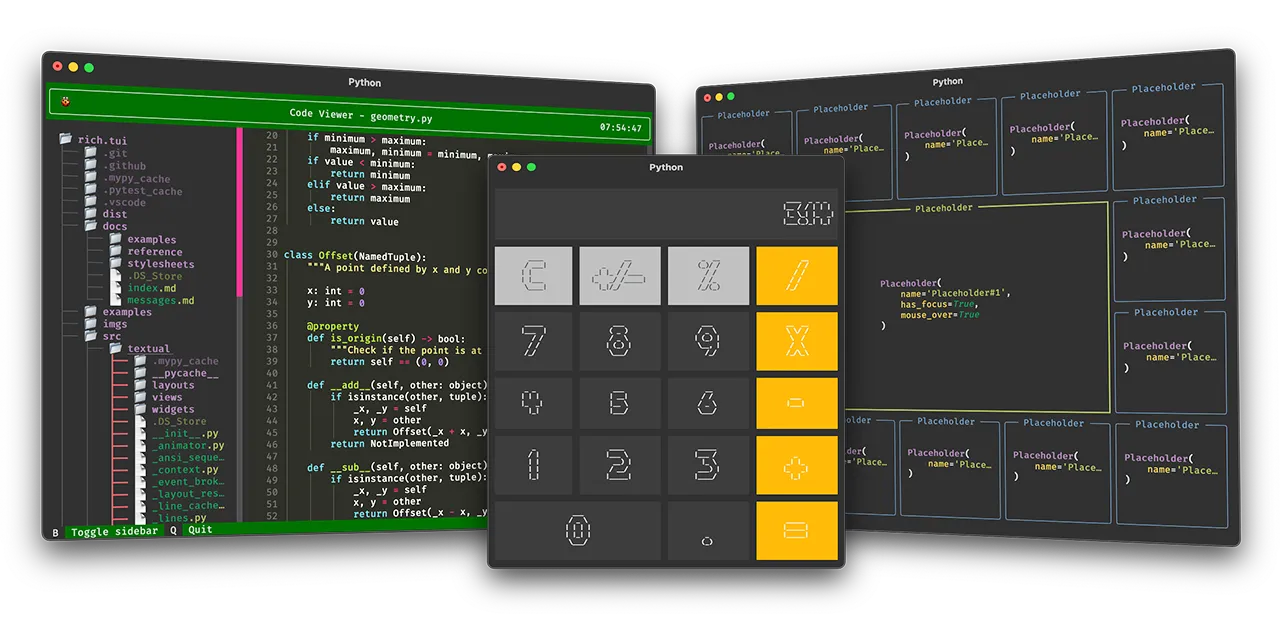
We want to create a small project to test out an amazing new library called Textual.
I mean, just look at what it can do!
Preparing a new Backpack
At the time of writing, the below commands are up to date. Those could change and things could break, so take away the essence of what needs to be done, and execute it given the new version of the tools you choose!
To prepare your new empty Python Environment, you need to know which Python version is required by your library.
Checking Textual’s GitHub Repo, we find
Textual runs on Linux, macOS, and Windows. Textual requires Python 3.7 or above.
We will go for Python 3.11 in this case. Given this Python version, what to do with it?
We previously mentioned:
- A Python Environment Manager to use.
So we will follow the docs to install it first.
Running
poetry --version
Poetry (version 1.3.2)
Shows that the installation was successful.
Now we create a new “backpack” by running
poetry new textual-demoSwitching to the newly created directly, we find the following structure
.
├── README.md
├── pyproject.toml
├── tests
│   └── __init__.py
└── textual_demo
    └── __init__.py

3 directories, 4 files
We also mentioned
- Creating a new Python Environment (Backpack) based on the versions we are managing (with tools like
pyenv).
To ensure that the python version you need is used, run the following:
poetry env use $(pyenv root)/versions/3.11.1/bin/pythonUsing virtualenv: /Users/jeanmarcalkazzi/Library/Caches/pypoetry/virtualenvs/textual-demo-WRrLXqmL-py3.11This will make sure that the version installed by pyenv previously is cloned into its own directory for this project.
You can check that by opening the pyproject.toml file and checking
python="^3.11.1"We still have the last point in our list
- Have a list of tools (libraries) to prepare for the adventure.
This is the important one, deciding on what will be installed specifically for this project’s python version which was cloned into its own directory.
Given that we need textual, we run
poetry add textualUsing version ^0.11.1 for textual
Updating dependencies
Resolving dependencies... (2.3s)
Writing lock file
Package operations: 25 installs, 0 updates, 0 removals
• Installing six (1.16.0)
• Installing markupsafe (2.1.2)
• Installing mdurl (0.1.2)
• Installing python-dateutil (2.8.2)
• Installing pyyaml (6.0)
• Installing click (8.1.3)
• Installing ghp-import (2.1.0)
• Installing jinja2 (3.1.2)
• Installing markdown (3.3.7)
• Installing markdown-it-py (2.1.0)
• Installing mergedeep (1.3.4)
• Installing packaging (23.0)
• Installing pyyaml-env-tag (0.1)
• Installing uc-micro-py (1.0.1)
• Installing watchdog (2.2.1)
• Installing linkify-it-py (1.0.3)
• Installing mdit-py-plugins (0.3.4)
• Installing mkdocs (1.4.2)
• Installing pygments (2.14.0)
• Installing zipp (3.14.0)
• Installing importlib-metadata (4.13.0)
• Installing mkdocs-exclude (1.0.2)
• Installing rich (13.3.1)
• Installing typing-extensions (4.5.0)
• Installing textual (0.11.1)After that, you should be able to use textual in your own isolated environment, with a pyproject.toml file describing the environment, making it reproducible and avoiding arguments like “It works on my machine”.
Looking at the pyproject.toml file, we can see the following
[tool.poetry]
name = "textual-demo"
version = "0.1.0"
description = ""
authors = ["Jean-Marc Alkazzi <...>"]
readme = "README.md"
packages = [{include = "textual_demo"}]

[tool.poetry.dependencies]
python = "^3.11.1"
textual = "^0.11.1"


[build-system]
requires = ["poetry-core"]
build-backend = "poetry.core.masonry.api"
Whenever you are faced with an adventure now, you know how to choose your backpack, how to buy your backpacks, how to manage them, how to clone them for each adventure, and how to get the tools you need without messing up the rest of your adventures!
What could possibly go wrong?
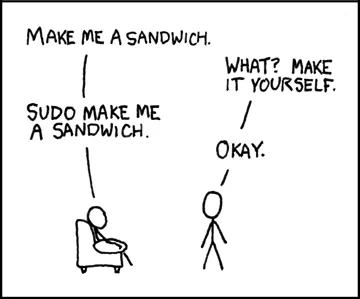
sudo is short for super user do. Which tells your system to do something with elevated priviledges. Don’t use this super power on everything by forcing your system to execute every command this way. The only time you would need such power is to install system-related packages. If you find yourself using sudo to force every command to just run, you should probably take a deep breath.
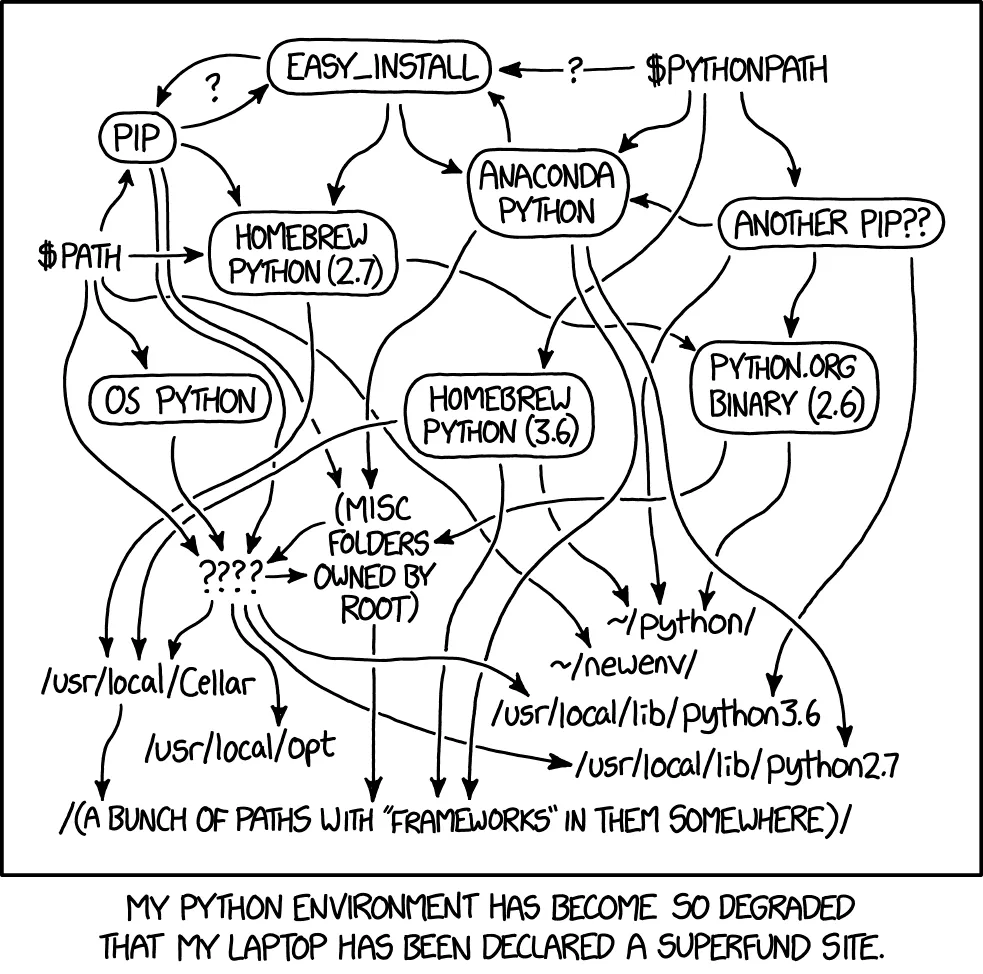
If you mess up your Python installations, you could get too many python versions on your system

Hiring multiple assistants to take care of all your backpacks, and ending up with 8 different “hiking” backpacks with different tools. Now this will be a confusing situation.
This xkcd post shows what we want to try with the above approach.
One more tip, just make sure you don’t go into the vim/emacs battle and end up using butterflies
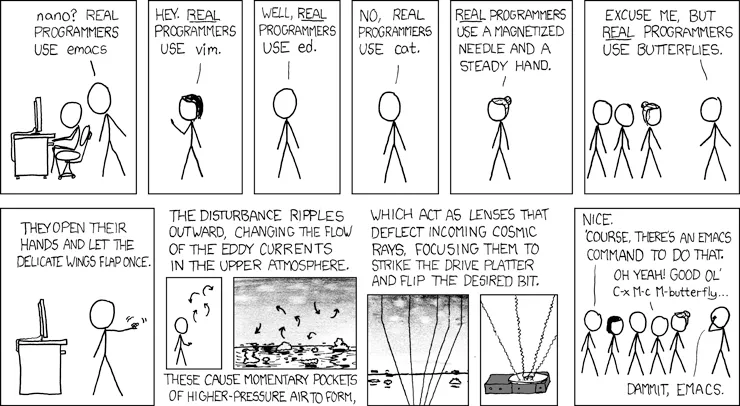
Just use the tools you like, as long as you are fulfilling the required behaviors.
Until next adventure!